Introduction
G’day, mates! If you’ve got an awning that’s seen better days, you might be wondering whether to roll up your sleeves and tackle the fabric replacement yourself or call in the pros. It’s a fair dinkum question, and one that deserves a thorough answer. After all, your awning isn’t just a pretty face – it’s your outdoor area’s first line of defence against the harsh Aussie sun and those unexpected downpours.
In this comprehensive guide, we’ll dive deep into the world of awning fabric replacement. We’ll compare the DIY approach with professional services, weigh up the costs, and give you the lowdown on everything you need to know to make an informed decision. So, grab a cuppa and let’s get stuck into it!
Understanding Awning Fabric Replacement
Before we get into the nitty-gritty of DIY vs. professional replacement, let’s take a moment to understand what awning fabric replacement actually entails.
Awning fabric replacement is like giving your outdoor space a facelift. It involves removing the old, worn-out fabric from your awning frame and installing a new, fresh piece. Sounds simple enough, right? Well, not so fast. There’s more to it than meets the eye.
The process can vary depending on the type of awning you have. Fixed awnings, retractable awnings, and freestanding structures all have their own quirks when it comes to fabric replacement. And let’s not forget about the different fabric types – from classic canvas to modern synthetic materials, each has its own set of pros and cons.
“Replacing awning fabric is like performing surgery on your outdoor space. It requires precision, the right tools, and a good understanding of the patient – in this case, your awning.” – Barry Thompson, Master Awning Installer
So, whether you’re considering a DIY job or thinking about calling in the experts, it’s crucial to understand the scope of the task at hand. It’s not just about slapping on a new piece of fabric – it’s about ensuring your awning continues to serve its purpose effectively for years to come.
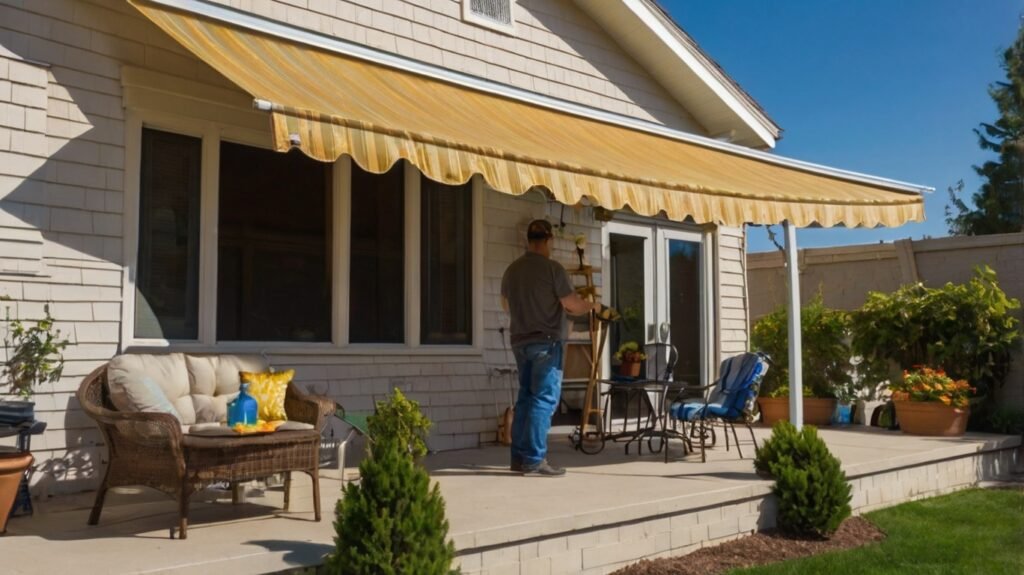
The DIY Approach
Ah, the allure of DIY. There’s something uniquely satisfying about tackling a home improvement project with your own two hands, isn’t there? When it comes to awning fabric replacement, the DIY route can be tempting for several reasons.
Pros of DIY Awning Fabric Replacement
- Cost Savings: Let’s face it – one of the biggest drawcards of DIY is the potential to save a few dollarydoos. By doing the job yourself, you’re cutting out labour costs, which can make up a significant portion of professional service fees.
- Flexibility: When you’re the boss, you set the schedule. DIY allows you to work at your own pace and on your own time. No need to wait for a professional to fit you into their busy calendar.
- Learning Experience: There’s no better way to understand how your awning works than by getting up close and personal with it. DIY replacement can give you valuable insights into your awning’s mechanics.
- Sense of Achievement: Successfully completing a DIY project can give you a real sense of pride. Imagine kicking back under your newly replaced awning, knowing you did it all yourself!
Cons of DIY Awning Fabric Replacement
- Time-Consuming: If you’re not experienced with awning replacement, be prepared to invest a significant amount of time. What might take a pro a few hours could stretch into a weekend-long project for a DIYer.
- Potential for Mistakes: Let’s be honest – mistakes happen, especially when you’re tackling a new task. A wrong cut or improper installation could lead to bigger problems down the track.
- Tool Investment: Unless you’re a regular DIY enthusiast, you might need to purchase or rent specialised tools for the job. This can eat into your potential cost savings.
- Physical Demands: Awning fabric replacement often involves working at heights and handling large, unwieldy pieces of fabric. It can be physically demanding and potentially risky if you’re not comfortable with such tasks.
“DIY can be rewarding, but it’s important to honestly assess your skills and the complexity of the job. Sometimes, calling in a professional can save you time, stress, and even money in the long run.” – Sarah Jenkins, Home Improvement Blogger
Professional Awning Fabric Replacement
Now, let’s shift gears and take a gander at what professional awning fabric replacement brings to the table. When you hire a pro, you’re not just paying for the service – you’re investing in expertise, efficiency, and peace of mind.
Advantages of Professional Replacement
- Expertise and Experience: Professional awning installers have seen it all. They’ve dealt with every type of awning under the sun (pun intended) and know how to handle any curveballs that might pop up during the replacement process.
- Time Efficiency: What might take you a full weekend could be knocked over in a matter of hours by a professional team. They’ve got the process down to a fine art.
- Quality Assurance: Reputable professionals often provide warranties on their work. This means if something goes wrong, you’re covered.
- Access to Quality Materials: Professionals often have access to a wider range of high-quality fabrics and materials that might not be readily available to the average DIYer.
- Safety: Working at heights and handling large pieces of fabric can be risky. Professionals are trained in safety procedures and have the right equipment to do the job safely.
Drawbacks of Professional Replacement
- Higher Upfront Cost: There’s no beating around the bush – professional services come with a higher price tag. You’re paying for labour, expertise, and often, premium materials.
- Scheduling Constraints: You’ll need to work around the professional’s schedule, which might not always align perfectly with yours.
- Less Personal Involvement: If you’re the type who likes to be hands-on with home improvements, you might feel a bit left out of the process.
“When you hire a professional, you’re not just paying for the service – you’re buying peace of mind. There’s value in knowing the job will be done right the first time.” – Mike Chen, Awning Installation Expert
Comparing Costs: DIY vs. Professional
Now, let’s talk turkey – how much are you really saving by going the DIY route? It’s not as straightforward as you might think.
DIY Costs
When calculating DIY costs, consider:
- Materials: This includes the fabric, thread, and any additional hardware you might need.
- Tools: You might need to purchase or rent specialised tools.
- Your Time: While not a direct monetary cost, your time is valuable.
- Potential for Mistakes: Factor in the cost of potentially having to redo parts of the job or fix mistakes.
Professional Costs
Professional costs typically include:
- Labour: This is often the largest portion of the cost.
- Materials: Usually high-quality and backed by warranties.
- Equipment Use: No need to buy or rent specialised tools.
- Warranties: Many professionals offer warranties on their work.
While DIY might seem cheaper at first glance, it’s important to consider all these factors. In some cases, the peace of mind and quality assurance that comes with professional installation might be worth the extra cost.
Tools and Materials Needed
Whether you’re leaning towards DIY or just want to understand what the pros use, here’s a list of common tools and materials needed for awning fabric replacement:
Tools:
- Measuring tape
- Utility knife
- Scissors
- Screwdriver set
- Pliers
- Staple gun
- Sewing machine (for some types of awnings)
- Ladder or scaffolding
Materials:
- Awning fabric
- Thread (if sewing is required)
- Staples
- Replacement hardware (if needed)
- Sealant
Remember, the specific tools and materials can vary depending on your awning type and the replacement method. If you’re going the DIY route, it’s crucial to research your specific awning model and gather all necessary supplies before starting the project.
Step-by-Step Guide for DIY Replacement
If you’ve decided to take the plunge and replace your awning fabric yourself, here’s a general guide to get you started. Keep in mind that this is a simplified overview – always consult specific instructions for your awning model.
1. Measure and Order Fabric
Accurate measurements are crucial. Measure the length and width of your current awning fabric, adding a bit extra for hemming and attachment. Order your new fabric based on these measurements.
2. Remove the Old Fabric
Carefully remove the old fabric from the awning frame. Take note of how it’s attached – you’ll need to replicate this with the new fabric.
3. Clean the Frame
With the old fabric removed, take this opportunity to clean the frame thoroughly. Check for any damage or rust that might need addressing.
4. Prepare the New Fabric
If necessary, cut the new fabric to size, allowing for hems and attachment points. If your awning requires sewn pockets for the frame, now’s the time to do that.
5. Attach the New Fabric
Carefully attach the new fabric to the frame, starting at one end and working your way across. Ensure it’s taut but not overstretched.
6. Secure Attachment Points
Double-check all attachment points to ensure the fabric is secure. This might involve stapling, screwing, or using other fastening methods depending on your awning type.
7. Test the Awning
If you have a retractable awning, test the mechanism to ensure smooth operation with the new fabric.
Remember, this is a simplified guide. Each awning is different, and the replacement process can vary significantly between models. If at any point you feel unsure or overwhelmed, don’t hesitate to call in a professional.
Common Pitfalls to Avoid
Even the most confident DIYer can fall into traps when replacing awning fabric. Here are some common pitfalls to watch out for:
1. Inaccurate Measurements
Measuring once and cutting twice doesn’t cut it here, mate. Double and triple-check your measurements before ordering fabric or making any cuts.
2. Choosing the Wrong Fabric
Not all awning fabrics are created equal. Make sure you choose a fabric that’s suitable for your climate and awning type.
3. Improper Tension
Fabric that’s too loose will sag and collect water. Too tight, and you risk damaging the frame or the fabric itself.
4. Ignoring Weather Conditions
Trying to replace your awning fabric on a windy day is asking for trouble. Choose a calm, dry day for your project.
5. Overlooking Small Details
Don’t forget about things like water drainage channels or specific attachment methods. These small details can make a big difference in your awning’s performance.
6. Rushing the Job
Rome wasn’t built in a day, and your awning shouldn’t be replaced in an hour. Take your time to ensure everything is done correctly.
“The devil’s in the details when it comes to awning fabric replacement. It’s often the little things that separate a professional-looking job from a DIY disaster.” – Emma Lawson, Home Improvement Specialist
When to Choose Professional Help
While DIY can be rewarding, there are times when it’s best to swallow your pride and call in the cavalry. Here are some situations where professional help is recommended:
- Complex Awning Systems: If you have a high-end retractable awning with motorised components, it’s best left to the pros.
- Large or High Awnings: Anything that requires extensive work at heights is better handled by professionals with the right safety equipment.
- Custom Shapes or Sizes: If your awning isn’t a standard rectangle, getting a perfect fit can be tricky. Professionals have the skills to handle custom work.
- Time Constraints: If you need the job done quickly and correctly, professionals can usually complete the work much faster than a DIY approach.
- Warranty Considerations: Some awning warranties may be voided if the fabric is replaced by a non-professional.
- Lack of Confidence: If you’re not completely sure you can handle the job, it’s better to be safe than sorry. A botched DIY job could end up costing more than professional installation in the long run.
Remember, there’s no shame in recognising when a job is beyond your skill level. Sometimes, the smartest DIY decision is knowing when to call a professional.
Maintenance Tips for Longevity
Whether you’ve gone the DIY route or hired a pro, proper maintenance is key to ensuring your new awning fabric lasts as long as possible. Here are some tips to keep your awning looking schmick:
- Regular Cleaning: Give your awning a good clean every few months. Use a soft brush and mild soap solution to gently remove dirt and debris.
- Address Stains Promptly: Don’t let stains set in. Clean them as soon as you notice them.
- Check for Loose Fabric: Periodically check that the fabric remains taut and secure. Address any loose areas promptly to prevent further damage.
- Inspect for Damage: Keep an eye out for small tears or holes and repair them quickly before they become bigger problems.
- Retract in Severe Weather: If you have a retractable awning, make sure to bring it in during heavy rain, strong winds, or hailstorms.
- Apply Protective Treatment: Consider applying a water-repellent treatment to your fabric every few years to enhance its resistance to weather and stains.
- Mind the Mechanisms: For retractable awnings, keep the moving parts clean and lubricated as per the manufacturer’s instructions.
“An ounce of prevention is worth a pound of cure. Regular maintenance can significantly extend the life of your awning fabric, saving you money and hassle in the long run.” – Tom Wilson, Awning Maintenance Expert
Conclusion
Well, there you have it, folks – everything you need to know about DIY vs. professional awning fabric replacement. Whether you decide to roll up your sleeves and tackle the job yourself or call in the experts, you’re now armed with the knowledge to make an informed decision.
Remember, there’s no one-size-fits-all answer. The best choice depends on your specific situation, skills, and comfort level. If you’re handy with tools and have a straightforward awning, DIY might be right up your alley. But if you’re dealing with a complex system or value peace of mind above all else, professional installation could be worth every cent.
Whichever path you choose, the end goal is the same – a beautifully refreshed awning that’ll keep you cool and protected for years to come. So here’s to sunny days, shady spots, and awnings that stand the test of time. Cheers, mates!
FAQs
- How often should awning fabric be replaced?
On average, quality awning fabric lasts 5-10 years, depending on weather exposure and maintenance. - Can I use any fabric for my awning replacement?
No, it’s crucial to use specifically designed awning fabric that’s weather-resistant and durable. - How long does professional awning fabric replacement take?
Typically, professionals can complete the job in 1-2 days, depending on the awning size and complexity. - Is it cheaper to repair awning fabric or replace it entirely?
For small damages, repairs might be more cost-effective. However, if the fabric is old or extensively damaged, full replacement is often the better long-term solution. - Can I replace my manual awning with a motorised one?
Yes, but this is a job best left to professionals as it involves electrical work and significant modifications to the awning structure. - What’s the best time of year to replace awning fabric?
Late spring or early fall are ideal, when the weather is mild and you’re less likely to need the awning’s protection. - How much does professional awning fabric replacement cost in Australia?
Costs vary widely depending on size and complexity, but typically range from $500 to $2000+ for professional replacement in Australia. - Can I use a pressure washer to clean my awning fabric?
It’s generally not recommended as high pressure can damage the fabric. Stick to gentle cleaning methods with a soft brush and mild soap solution. - What’s the most durable awning fabric available in Australia?
Solution-dyed acrylic fabrics like Sunbrella are among the most durable and popular choices for Australian conditions. - If I replace the fabric myself, will it void my awning’s warranty?
It might. Check your warranty terms carefully – many manufacturers require professional installation to maintain warranty coverage.